How to Make Curved Line Joints in OmniGraffle
The OmniGraffle application is a superb piece of vector-diagram drawing software. It’s easy to create complex, multi-layered diagrams very quickly in OmniGraffle. However, it did take me a while to work out how to produce curved line joints that connect objects. I’ll show you how to do it in this article.
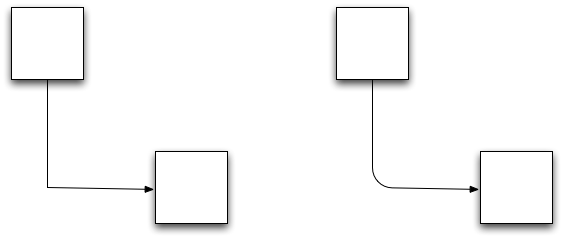
The following diagrams show the same simple arrangement of two boxes connected by an arrowed line. The diagram on the left uses a straight right-angled joint. Such joints are nice and simple, but I prefer curved joints, as shown in the diagram on the right.
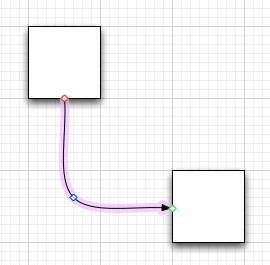
Because OmniGraffle has a curved line setting, it’s logical to try and make a curved joint with with a curved line. Using a curved line does produce a curved joint, but it’s not quite right, as demonstrated in the following screenshot.
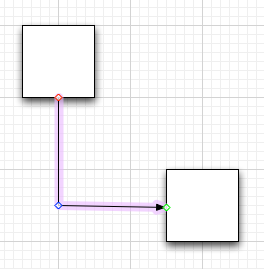
To make a nice curved joint, you need to start with a straight right-angled joint and then set its corner radius attribute. First, join the two objects with a line and add a point to create the right-angled joint.
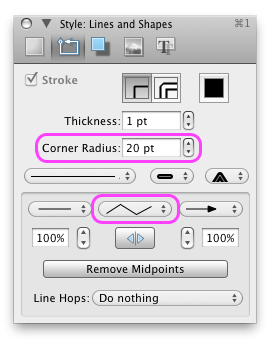
Next, change the corner radius of the line in OmniGraffle’s line-attribute Inspector. I use a 20 pt corner radius, which produces the following nicely curved angle.